How to connect paddle?

Supported Payment Currencies (for charging customers)

Paddle enables transactions in over 30 currencies, each with support for card payments and local checkouts. Below is a complete list:

  • USD – US Dollar

  • EUR – Euro

  • GBP – Pound Sterling

  • ARS – Argentine Peso

  • AUD – Australian Dollar

  • BRL – Brazilian Real

  • CAD – Canadian Dollar

  • CHF – Swiss Franc

  • CNY – Chinese Yuan

  • COP – Colombian Peso

  • CZK – Czech Koruna

  • DKK – Danish Krone

  • HKD – Hong Kong Dollar

  • HUF – Hungarian Forint

  • ILS – Israeli Shekel

  • INR – Indian Rupee

  • JPY – Japanese Yen

  • KRW – South Korean Won

  • MXN – Mexican Peso

  • NOK – Norwegian Krone

  • NZD – New Zealand Dollar

  • PLN – Polish Zloty

  • RUB – Russian Ruble

  • SEK – Swedish Krona

  • SGD – Singapore Dollar

  • THB – Thai Baht

  • TRY – Turkish Lira

  • TWD – New Taiwan Dollar

  • UAH – Ukraine Hryvnia

  • VND – Vietnamese Dong

  • ZAR – South African Rand

To start using PaddlePay with WooCommerce, you need to connect your Paddle account using your Client Token and API Key.

Step 1: Get Your Credentials from Paddle

  1. Log in to your Paddle Dashboard.

  2. Go to Developer Tools → Authentication.

  3. Copy the Client Token and API Key from this page.

    • Keep them safe — they are sensitive credentials.

Step 2: Add Your Credentials to WooCommerce

  1. In your WordPress dashboard, go to WooCommerce → Settings → Payments.

  2. Click on Paddle in the list of payment methods.

  3. Paste your Client Token and API Key into the respective fields.

  4. Save your changes.

Step 3: Test Your Connection

  • Create a test product and try the checkout process in Sandbox Mode to ensure everything is working.

  • Once confirmed, switch to Live Mode for real transactions.

💡 Tip: Always test in Sandbox before going live to avoid unexpected charges.

Step 4: Test Your Connection

  1. Create a test product in WooCommerce.

  2. Go to your store’s checkout and pay using Sandbox mode.

  3. If the order completes successfully, you’re ready to switch to Live mode.

You can see paddle price ID field with Edit Button. After clicking this you will se a popup.

From this popup you can directly add this product with a price and one time or recurring option to the paddle.

Paddle Checkout Settings – Website URL

Before you can start selling with PaddlePay, you must configure your Checkout Settings in your Paddle account:

  1. Log in to your Paddle Dashboard.

  2. Navigate to Developer Tools → Checkout Settings.

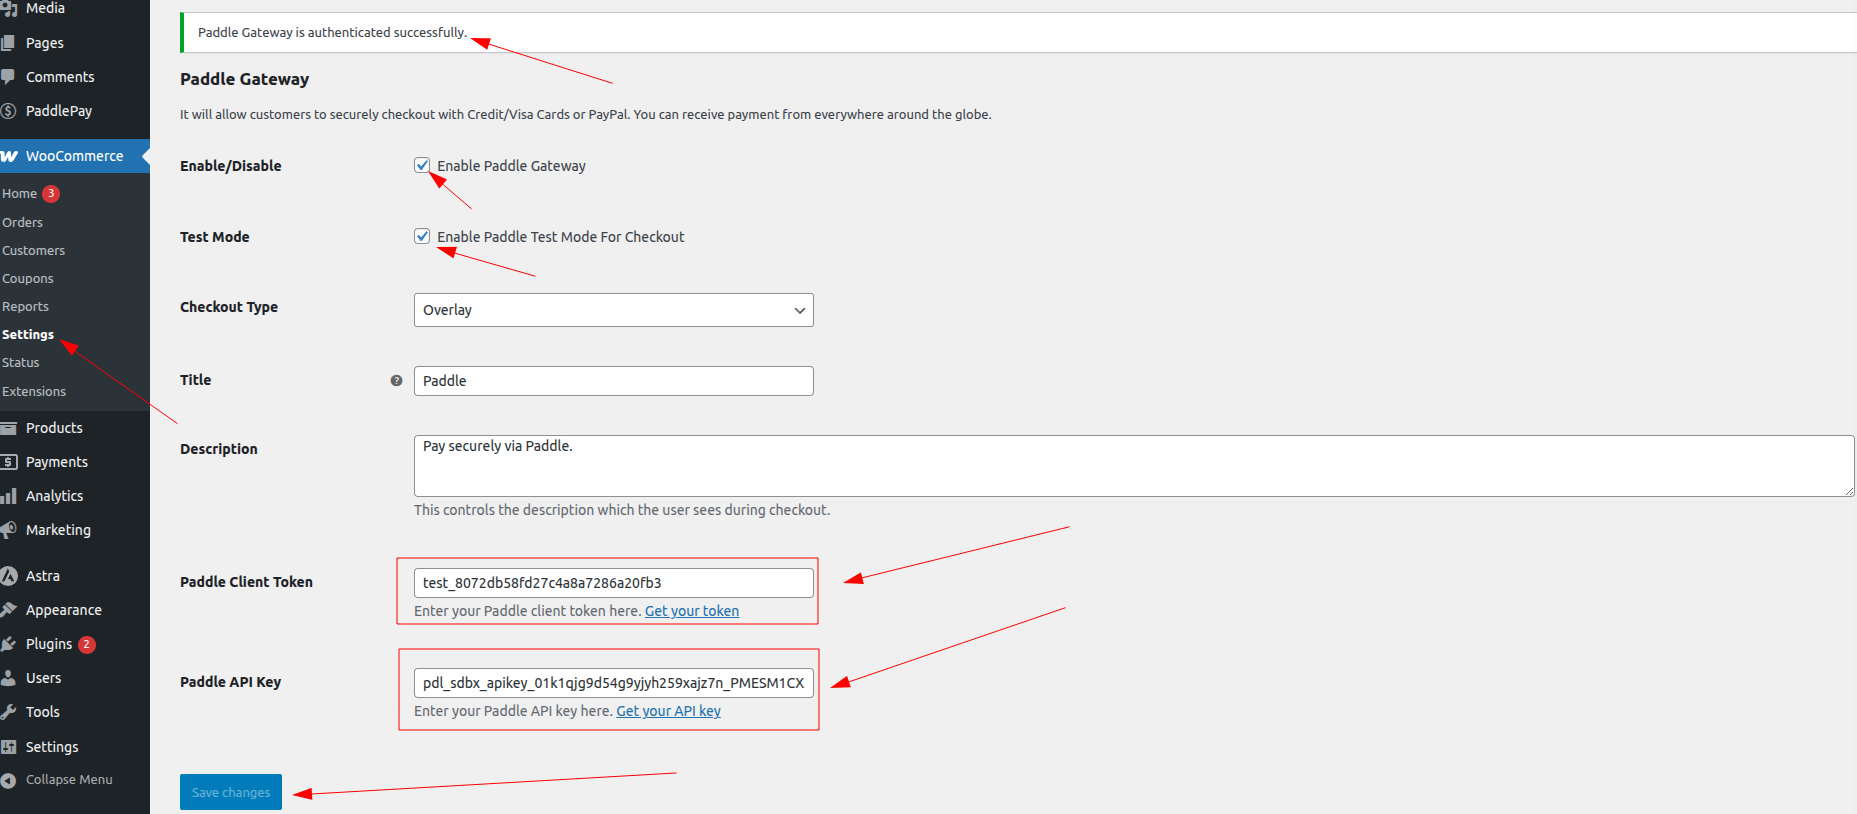
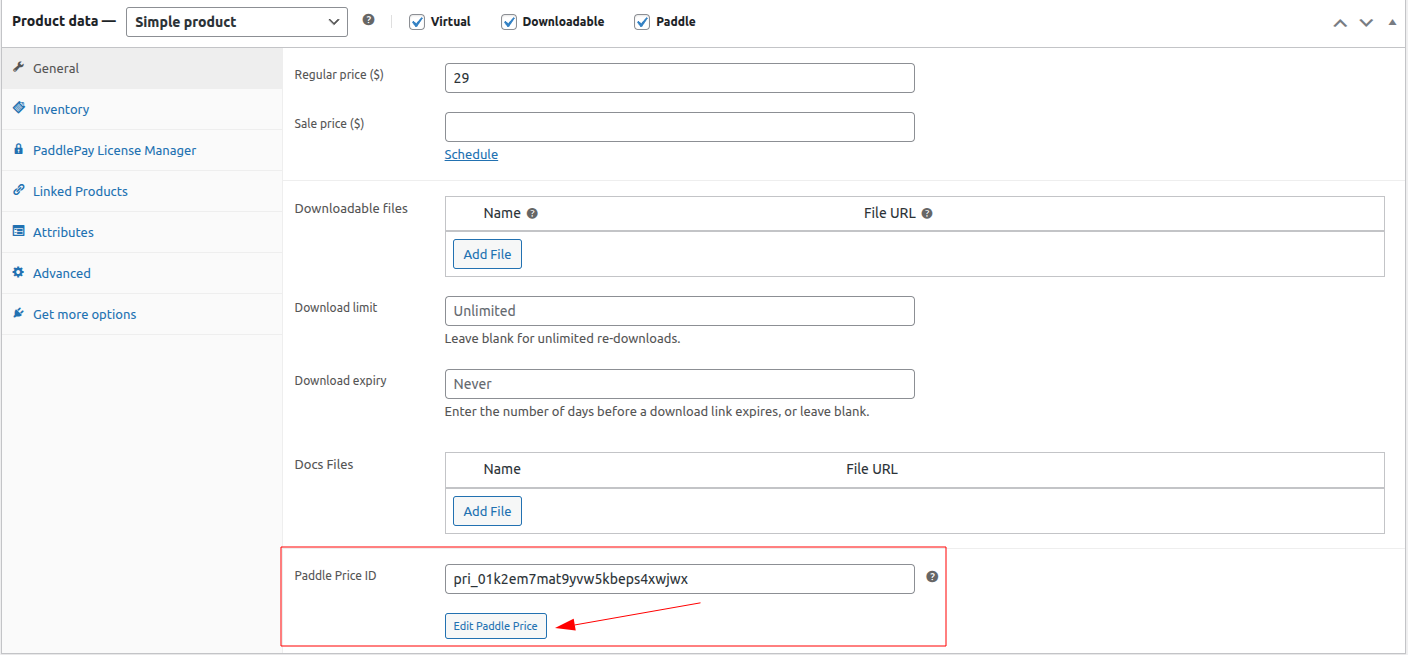
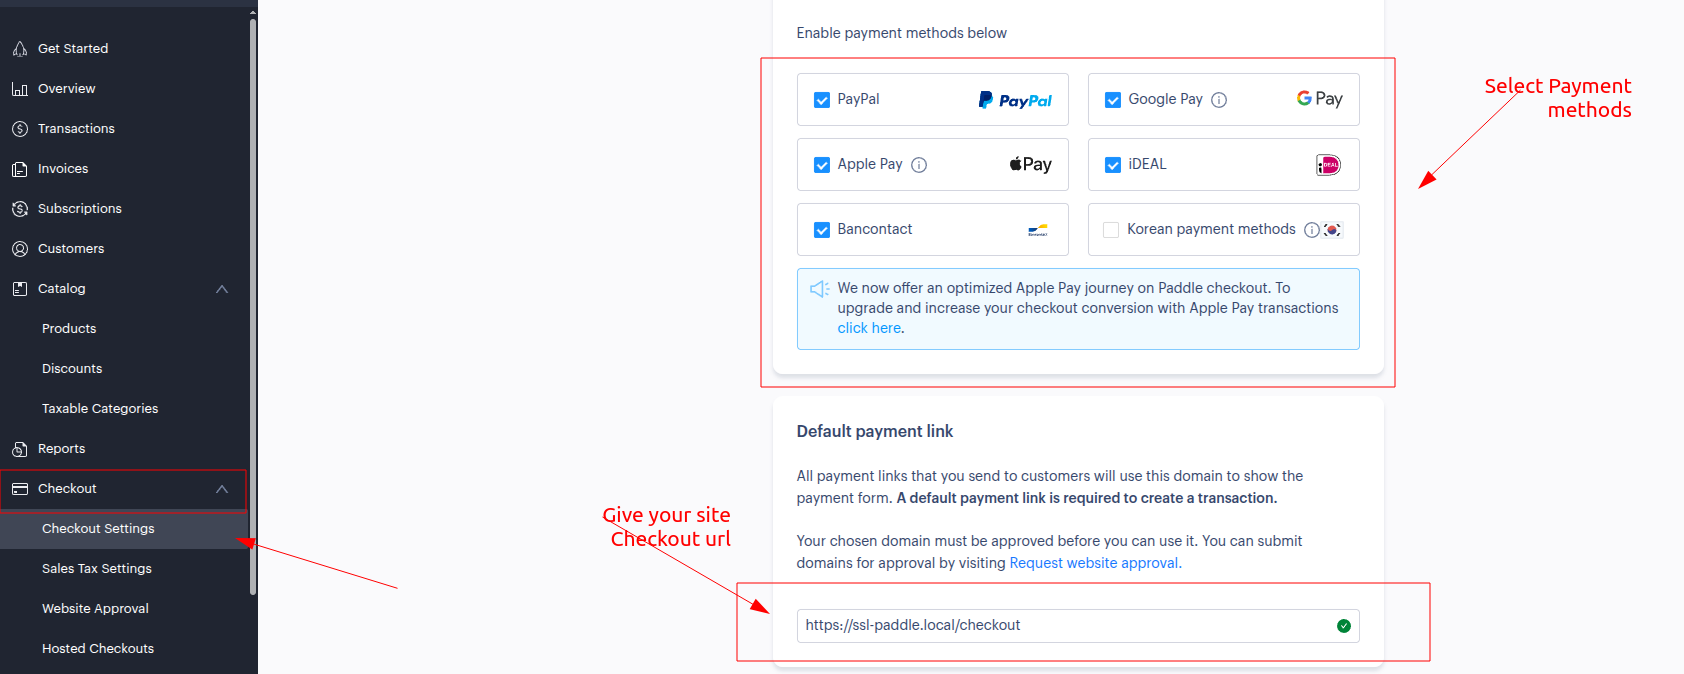
  3. In the Website URL field, enter the URL of your WooCommerce store (e.g., https://yourstore.com).

    • This is the domain where customers will complete their checkout.

    • Make sure your site uses HTTPS (SSL certificate installed).

  4. Save the settings.

⚠️ Important: Paddle will verify this URL, so ensure your site is accessible and matches your store branding. Without this step, Paddle checkout will not work with the plugin.